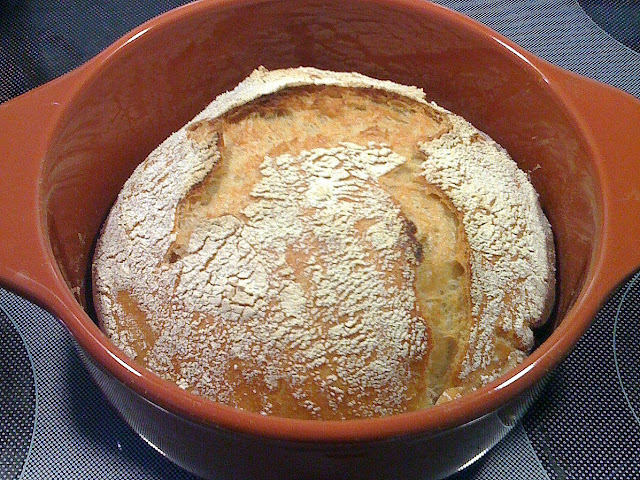
I know you’re all dying to know how “Whoops” (also knows as 3.0) turned out. Well, it turned out awesome! One of those days I promise to use terms like “hearty crust” and “golden crumb” to describe the results of my baking. There’s all this jargon around bread baking, much like in the wine connoisseur community. Where a novice like me would say “Wow, this is nice wine” the seasoned wine aficionado would speak of “bouquet” and “notes” and “finish” and all that stuff. Well, the bread baking community is like that too, but my standard is really simple. Does it smell good? Does it look good? Does it make your mouth water? Is the crust crunchy without being too hard? Does it taste divine with plain butter (if you can have butter – I’m currently avoiding dairy because of my son’s allergies, pout) or jam or honey? If the answer is yes, I call it a winner.
So, this is how the happy mistake (I used one cup white flour, one cup spelt flour and one cup dark rye) turned out:


So just for the sake of keeping track, here was my evolution of the no-knead bread.
The basic ingredients are as follows:
3 cups of all purpose or bread flour
1/4 teaspoon dry active yeast
1 1/4 teaspoon salt
1 5/8 (a little over 1 1/2) cups lukewarm water
You also need a covered clay or cast iron pot. I own a green version of this one made by IKEA (yes, Le Creuset is the best stuff money can buy, but I read here and there that it is not designed for as hot an oven as you need for baking bread, so if you’re going to risk it, better mess with a cheap Chinese knock-off).

Mix ingredients making “shaggy” looking dough (sticky, but not too wet) in a bowl. Cover and set in a warm place to rise overnight for 12-18 hours (longer is better). If your dough seems too wet, no worries, it will still turn out, but it will be a bit of a sticky mess to work with. Version 1.0 I used to much water. So, advice is add water gradually while you work the dough to avoid over-wetting.
The next night scoop out risen dough onto prepared (meaning, clean, I think) surface sprinkled generously with flour. Fold dough over on itself a couple of times, cover with plastic wrap (or a towel) and let “rest” (who knew that made the dough tired?) for 15 minutes.
Shape the dough into a ball, wrapping the “edges” under (so there’s a seam underneath) and place on generously pre-floured cotton dish towel (Target sells some for $1.00 a piece, I got a bunch). Cover with another dish towel (or wrap same one over on top, if it’s large enough) and go watch a movie or something for a couple of hours.
After about one hour and a half turn on your oven to 450 degrees and put your pot in there, cover and all. Half an hour later your oven and pot will be piping hot. Gingerly remove pot from oven, place on heat resistant surface (I have a glass top stove, so that’s where mine goes), remove cover (really carefully) and set it aside and dump your dough off the towel into the pot. The seam will now be on top. It may look messy and you’re likely to get flour on stuff, but that’s OK. Shake pot to distribute dough, cover, stick back in the oven for 30 minutes. After 30 minutes, reach in (carefully) and take cover off and bake 15-30 minutes longer uncovered, until the crust turns a yummy golden brown. (I discovered that with darker flours in my later experiments 15-20 minutes uncovered is long enough, so check at 15 minutes to gauge doneness.)
So here’s what my experimentation looked like since my first bread:
Version 1.0 (using all purpose flour and a clay pot, at my parents’ house in Virginia)

Version 1.1 (using King Arthur Unbleached Bread Flour and our cast iron pot, at home, it was fluffier because it rose more)

Version 2.0 (modified recipe, replacing one of the cups of flour with one cup of Bob’s Red Mill Organic Dark Rye Flour, adding one tablespoon of of honey and nearly doubling the yeast from 1/4 teaspoon to 3/8 teaspoon)
Version 2.1 (to which I added an extra tablespoon of honey, doubled the yeast to 1/2 teaspoon, reduced the salt to one teaspoon and reduced the water to right under 1 1/2 cups of water because 1.0 was too sticky and wet with the 1 5/8 the original recipe called for)

And on the inside it looked even better. The extra yeast helped it rise more, and I’m sure the honey fed it too. And it tasted so yummy! Move over $6/loaf fancy bread from Whole Foods!
Tonight I’m working on version 4.0, trying a new, lighter rye flour from a local mill (I’ll say more about ingredients in a separate post, but using quality ingredients obviously does matter).
If you try your hand at it, let me know. Happy baking!


No comments:
Post a Comment